For Live Help, click on the icon in the upper right corner of your screen.
Refreshing Data
Refreshing one or all modules – click on the button at the top of the screen.
Manual refreshing a tab – double-click on the tab name.
Manual refreshing a box – double–click on the blue bar at the top of the box.
Refreshing every X minutes – click on one of the ‘Auto-refresh’ buttons at the top of the screen and select the desired number of minutes. It starts once you click ‘OK’.
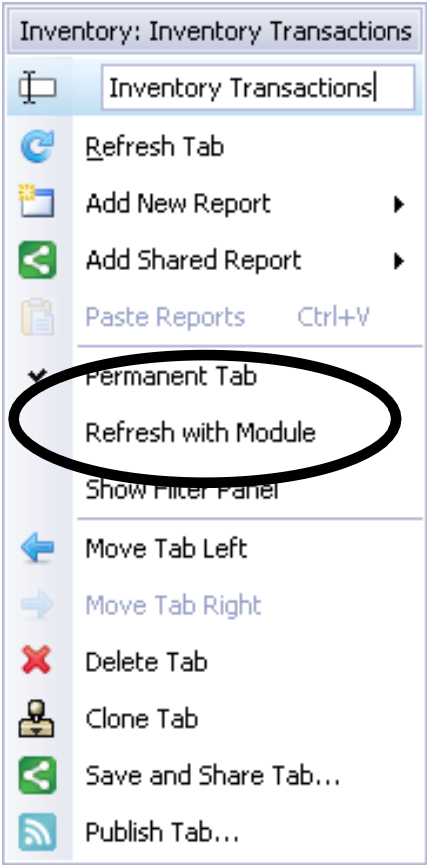
Recommendation – Turn OFF the auto-refreshing option for all items which you do not use every day or if your refresh times are long. Right-click on the tab name and un-check the ‘Refresh with Module’ check-box (see example below)
Column Chooser ‘Merge Rows’ option (this applies to all modules)
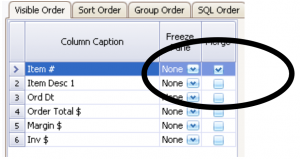
When viewing a listing of data (dates, items, customers, etc.), this new feature makes it easier for your eye to see when one starts and ends. To use this feature, click on the ‘Merge’ check-box in the column chooser. See the example below:
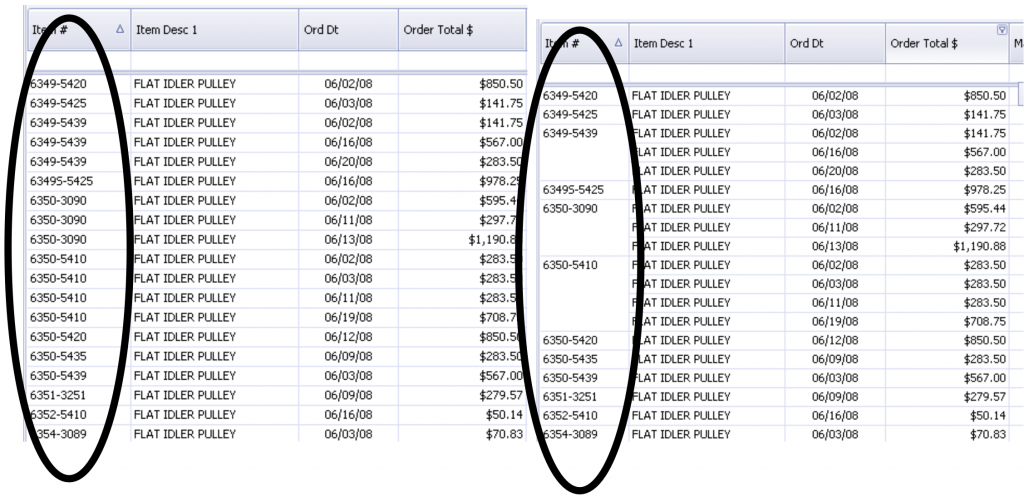
Before and After – Notice how much easier it is to read the screen on the right.
Accounting screens within the Executive module
How can the Executive module help me?
You can monitor important balance sheet items (ex. cash).
You can monitor accounts receivable balances.
You can monitor accounts payable balances.
You can monitor purchase order aging (needed cash into the future).
You can monitor selected expense account details.
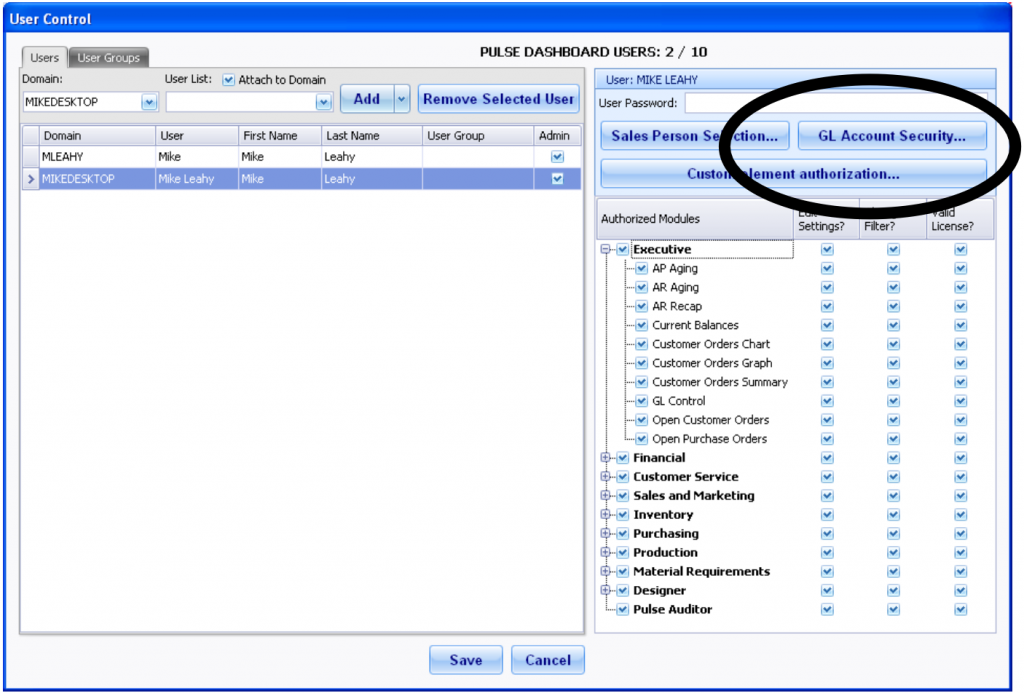
How do I control what G/L accounts can be viewed by each PULSE user?
You must be a PULSE administrator
Go to > User Control > GL Account Security
Specify all accounts or the accounts each person is allowed to view.
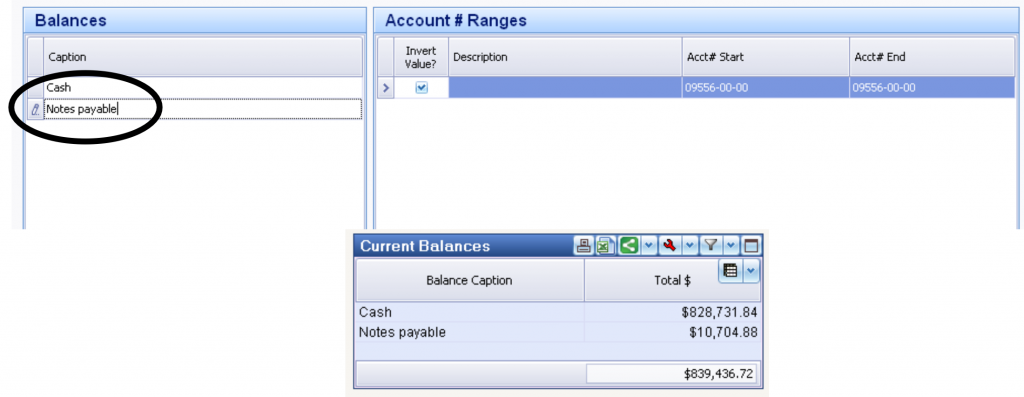
Cash Balances screen
Click on the red wrench set-up icon and select each account.
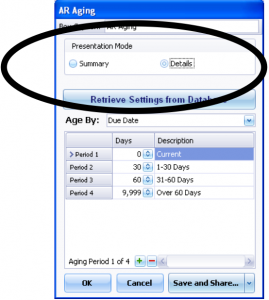
A/R Aging
Click on the red wrench set-up icon:
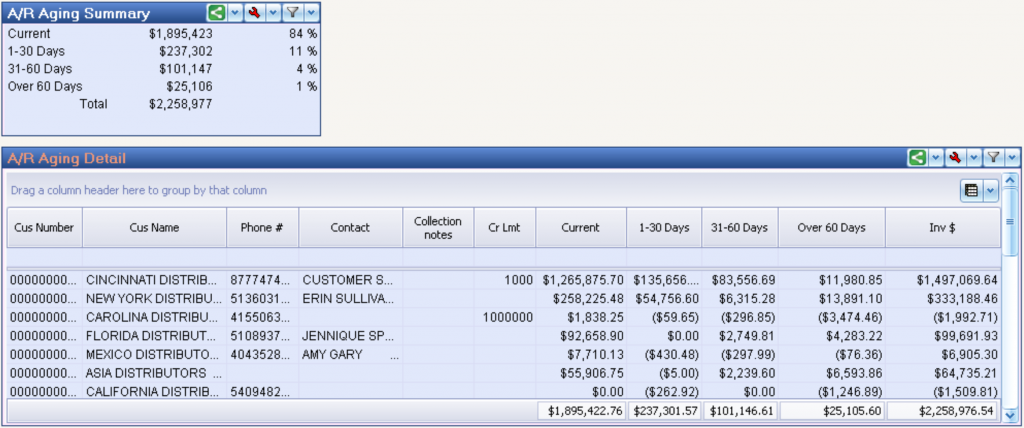
Select ‘Summary’ or ‘Detail’.
Click ‘Retrieve Settings from Database’ to use your Macola aging categories.
Select the date to use for aging and confirm your aging categories.
Note that you can have up to 8 aging categories.
The new ‘Detail’ option allows you to create a screen to can use for A/R collections. You can drill down to see the details of each unpaid item.
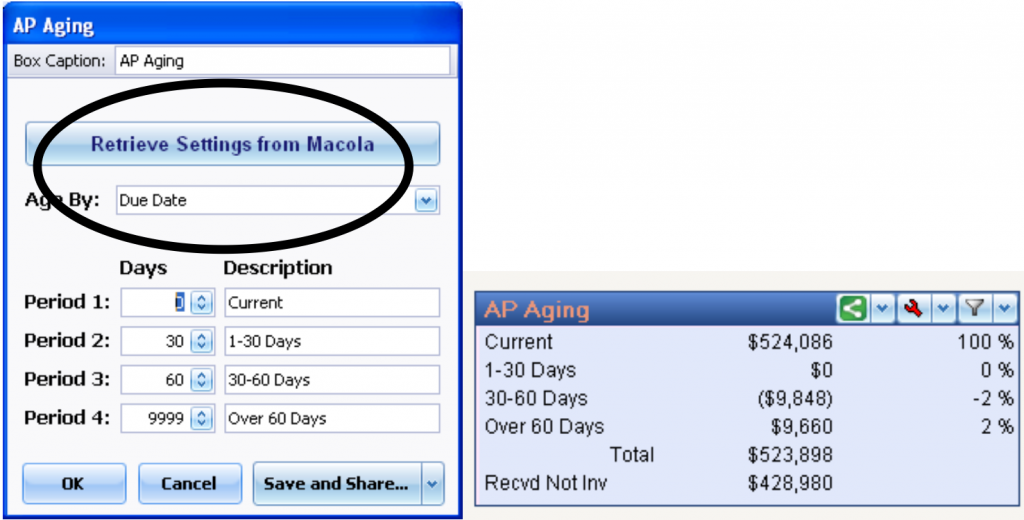
A/P Aging
Click on the red wrench set-up icon:
Click ‘Retrieve Settings from Database’ if you want to use your Macola aging categories
Select the date to use for aging, and confirm your aging categories.
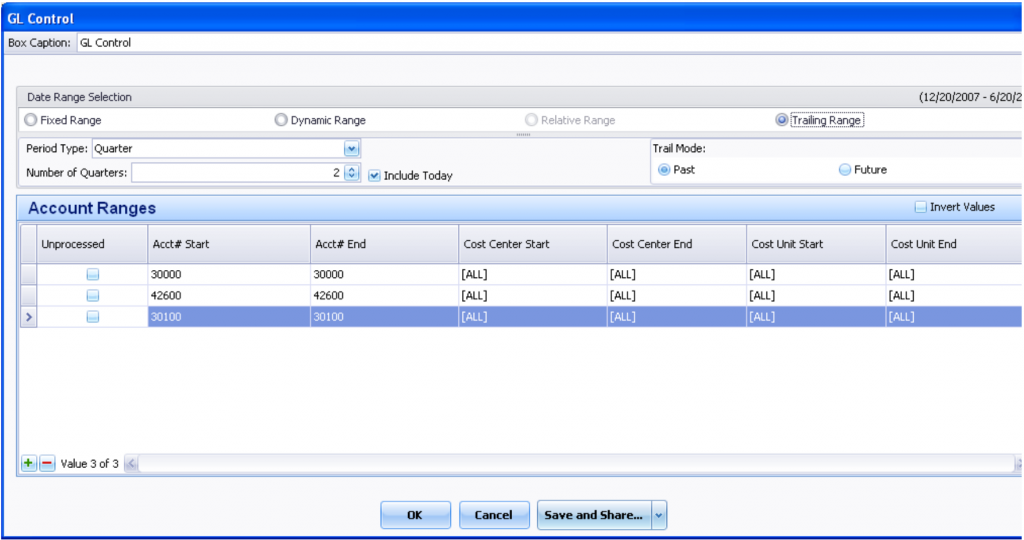
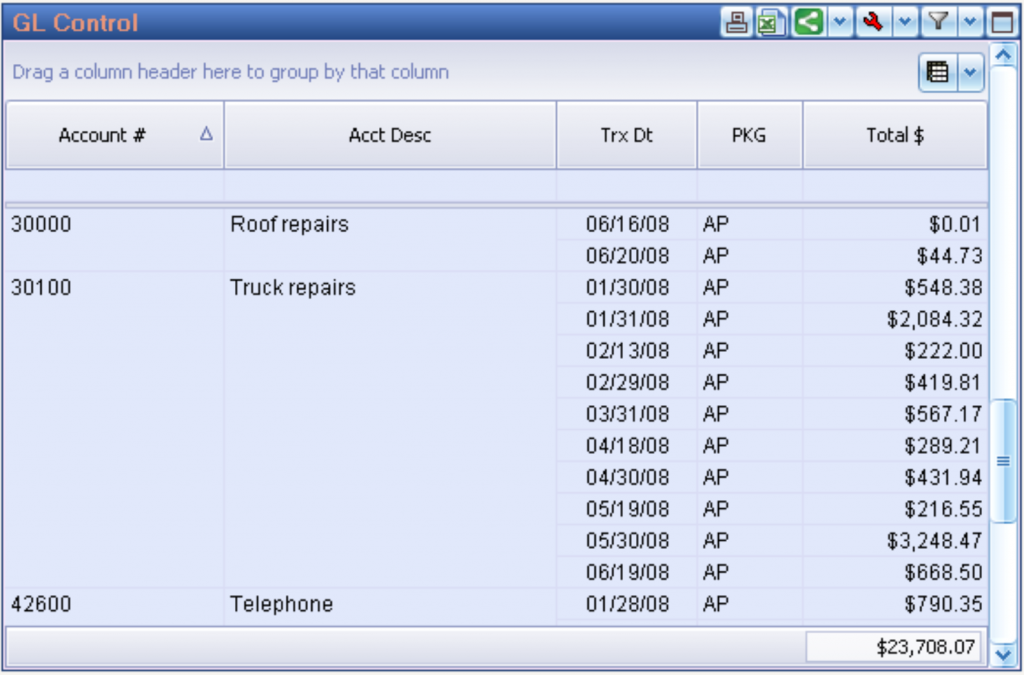
Expense Control/Monitoring
This can be used to quickly monitor selected expense accounts.
Click on the red set-up icon > select the account numbers > date selection.
Financial Control Module Screens
How can the Financial Control module help me?
Department managers can view their budget vs. actual results with full drill-down
View budget vs. actual by month
Cash Flow Forecast
Export all G/L transactions for further analysis
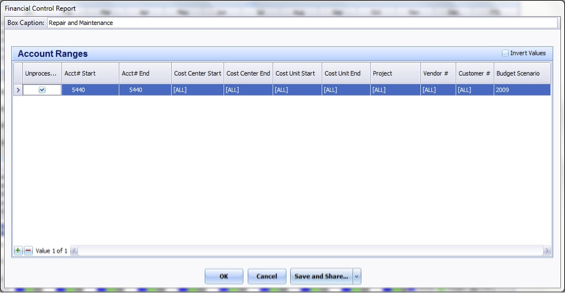
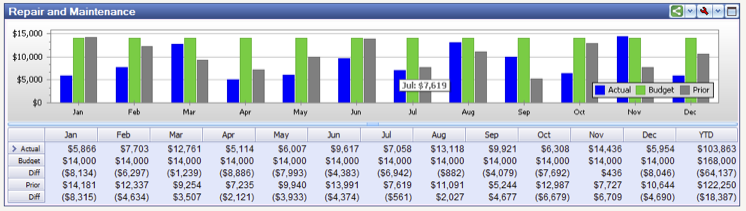
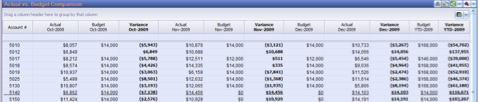
Budget vs. Actual for department managers
This report allows you to view actual vs. budget vs. prior year activity with full drill-down. Click the red wrench set-up icon > select the account(s) to be included.
Each manager will only be able to view their accounts.
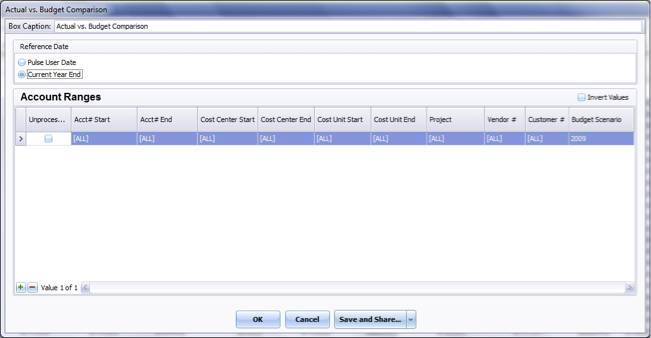
Actual vs. Budget
This screen allows you to view actual vs. budget data in a horizontal format. Click the red wrench set-up icon > select the account(s) to be included.
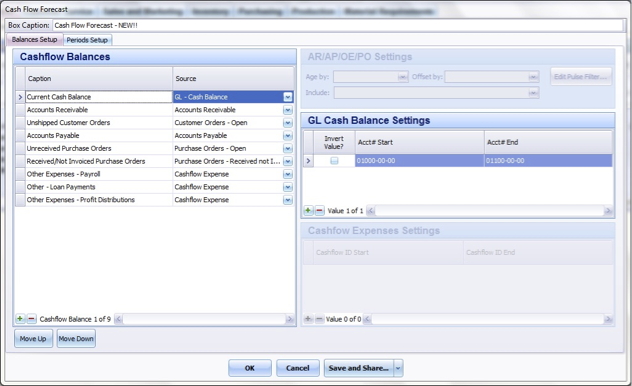
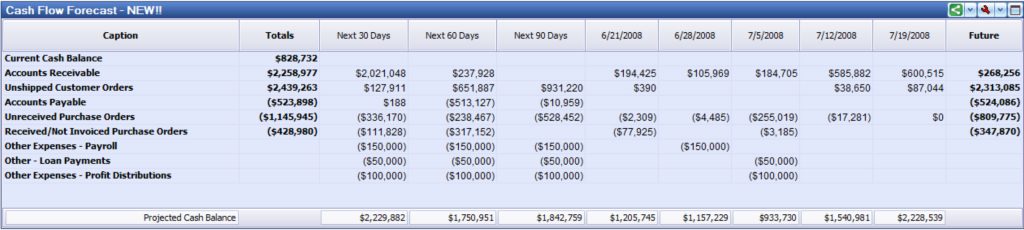
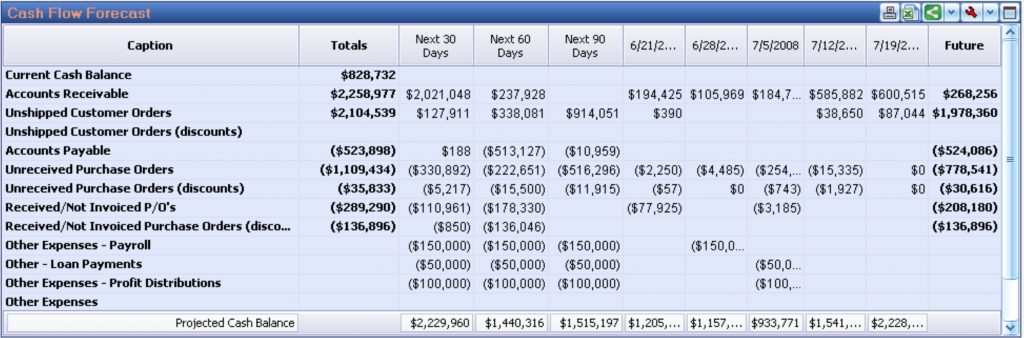
Cash Flow Forecast
You can display up to 20 columns of weeks, months, or a combination. You can display an unlimited number of optional ‘Other’ expense/income items (ex. payroll, loan payments, profit distributions, etc.).
Cash flow balances set-up screen. You will probably need to call our support desk for assistance or to review this screen for you.
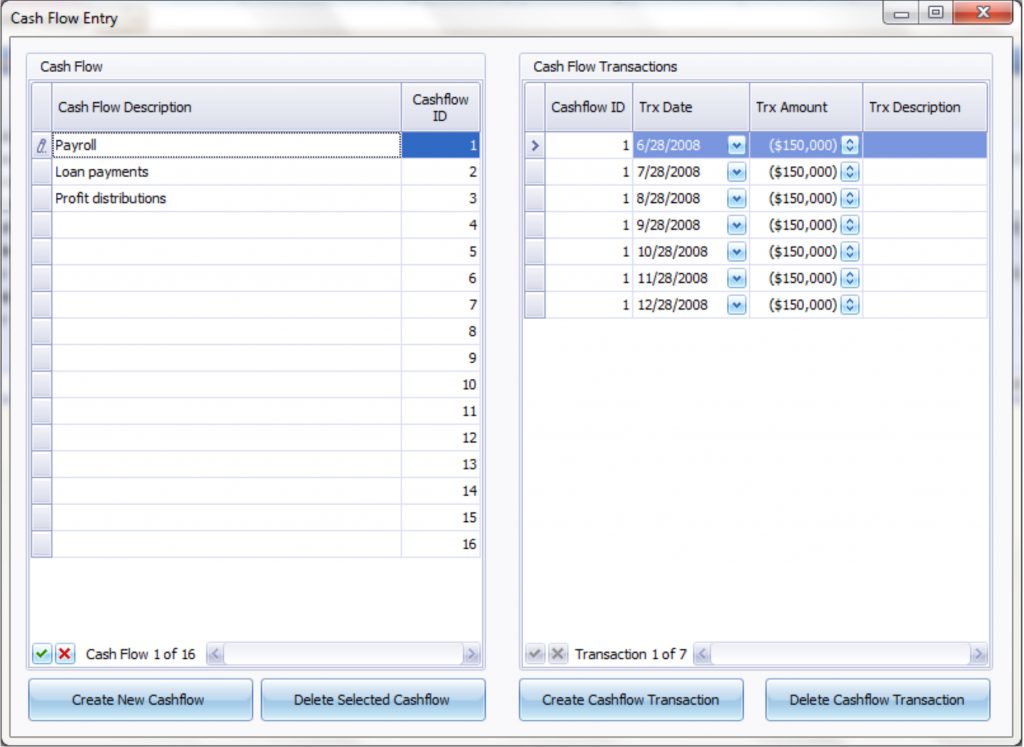
Entry screen for ‘Other’ expenses and income items.
Go to the top menu > Executive > Cash Flow Entry screen.
You can include an unlimited number of entries as well as transaction dates and amounts.
This document is intended as a reference for companies that are PULSE Dashboard customers. Please call our PULSE support desk with questions and comments at (513) 723-8095 or Support@PulseDashboard.com